
这段时间在研newlib,因为这个涉及到裸机编程时,如何使用c运行库。
newlib是一个面向嵌入式系统的c运行库。在裸机如果想要实现c运行库,那么newlib是最好的一个选择。而且newlib可以集成到gcc交叉编译器中,在使用gcc的时候,直接链接newlib库,生成可执行文件。
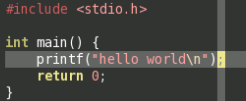
对于如下的代码:
使用aarch64-none-elf-gcc工具,直接编译的话,那么会有报错信息。
aarch64-none-elf-gcc hello.c –o hello.elf
提示,有些符号找不到。
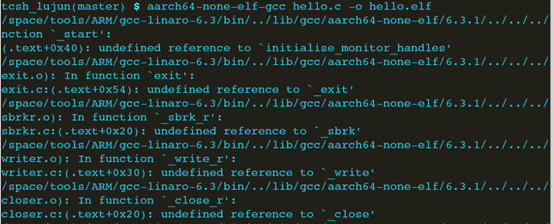
这些符号,是使用newlib库时,需要自己实现的桩函数,包括了_write,_close函数等等。因为newlib库,并不知道裸机底层,是如何实现这些操作的。
那么,newlib库中提供的函数,在我们编程的时候,又是如何调用的了。下面,就来详细,解析一下。
这里,我们以riscv-newlib这个github上托管的开源代码库为例,来说明。该版本库的github地址为https://github.com/riscv/riscv-newlib。
以调用write函数为例。在linux中,我们可以使用man 2 write,来查看write函数的使用。

write函数,总共3个参数,第一个是文件描述符,第二个是字符串,第三个是字符串长度。
如果我们在程序中,调用了write函数,那么就会调用newlib库中的write函数。该函数实现在 newlib/libc/syscalls/syswrite.c 中。
/* connector for write */
#include <reent.h>
#include <unistd.h>

_READ_WRITE_RETURN_TYPE
write (int fd,
const void *buf,
    size_t cnt)
{
return _write_r (_REENT, fd, buf, cnt);
}
在write函数中,会调用_write_r函数。
而_write_r函数,也实现在newlib库中。函数实现在newlib/libc/reent/writer.c中。
_ssize_t _write_r (struct _reent *ptr,
int fd,
const void *buf,
    size_t cnt)
{
 _ssize_t ret;

 errno = 0;
if ((ret = (_ssize_t)_write (fd, buf, cnt)) == -1 && errno != 0)
   ptr->_errno = errno;
return ret;
}
_write_r函数,带有_r后缀,表示该函数是可重入函数,也就是无论调用多少次,结果都是一样的。该函数,内部调用了_write函数。可重入函数,实现在reent目录下。
而_write函数,是没有实现在libc中的,而是在libgloss中。

在newlib库的顶层,有libgloss目录。
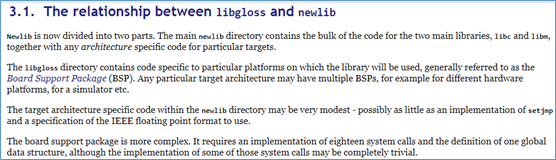
newlib官网上,介绍了libgloss和main newlib的关系。可以这样认为,libgloss是底层的驱动实现,而main newlib是有硬件平台无关的通用功能实现。
在libgloss下,以各个硬件平台为文件夹,进行组织的。这里我们关心aarch64。在aarch64目录中,有syscalls.c文件,里面,就实现了newlib需要的各个桩函数。
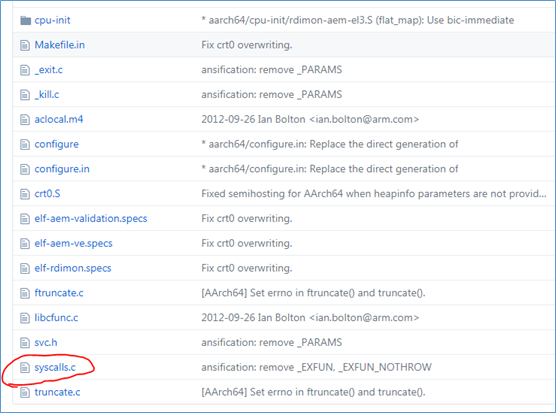
在这个文件中,我们可以看到定义了newlib需要的桩函数。
/* Forward prototypes.  */
int _system (const char *);
int _rename (const char *, const char *);
int _isatty (int);
clock_t _times (struct tms *);
int _gettimeofday (struct timeval *, void *);
int _unlink (const char *);
int _link (void);
int _stat (const char *, struct stat *);
int _fstat (int, struct stat *);
int _swistat (int fd, struct stat * st);
caddr_t _sbrk (int);
int _getpid (int);
int _close (int);
clock_t _clock (void);
int _swiclose (int);
int _open (const char *, int, ...);
int _swiopen (const char *, int);
int _write (int, char *, int);
int _swiwrite (int, char *, int);
int _lseek (int, int, int);
int _swilseek (int, int, int);
int _read (int, char *, int);
int _swiread (int, char *, int);
void initialise_monitor_handles (void);
我们来看_write函数的实现。
/* fd, is a user file descriptor. */
int _write (int fd, char *ptr, int len)
{
int res;
struct fdent *pfd;
 pfd = findslot (fd);
if (pfd == NULL)
{
     errno = EBADF;
return -1;
}
 res = _swiwrite (pfd->handle, ptr, len);
/* Clearly an error. */
if (res < 0)
return -1;

 pfd->pos += len - res;
/* We wrote 0 bytes?
    Retrieve errno just in case. */
if ((len - res) == 0)
return error (0);
return (len - res);
}
里面核心,调用了_swiwrite函数。_swiwrite函数,实现如下:
/* fh, is a valid internal file handle.
  Returns the number of bytes *not* written. */
int _swiwrite (int fh, char *ptr, int len)
{
 param_block_t block[3];
 block[0] = fh;
 block[1] = POINTER_TO_PARAM_BLOCK_T (ptr);
 block[2] = len;
return checkerror (do_AngelSVC (AngelSVC_Reason_Write, block));
}
在svc.h文件中,有定义相关的do_AngelSVC,AngelSVC_Reason_Write的实现。
/* Now the SWI numbers and reason codes for RDI (Angel) monitors.  */
#define AngelSVC                0xF000
#define AngelSVCInsn                "hlt"
#define AngelSVCAsm                hlt

/* The reason codes:  */
#define AngelSVC_Reason_Open            0x01
#define AngelSVC_Reason_Close            0x02
#define AngelSVC_Reason_WriteC            0x03
#define AngelSVC_Reason_Write0            0x04
#define AngelSVC_Reason_Write            0x05

/* Type of each entry in a parameter block.  */
typedef long long param_block_t;

static inline long long
do_AngelSVC (int reason, param_block_t * arg)
{
long long value;
 asm volatile ("mov w0, %w1; mov x1, %2; " AngelSVCInsn " %3; mov %0, x0"
        : "=r" (value) /* Outputs */
        : "r" (reason), "r" (arg), "n" (AngelSVC) /* Inputs */
        : "x0", "x1", "x2", "x3", "x17", "x30", "memory", "cc"
          /* Clobbers x0 and x1, and lr if in supervisor mode */);
return value;
}
do_AngelSVC是内嵌汇编。将内嵌汇编进行翻译,那么_swiwrite函数做了如下的一些事情:
-
第一个参数放到w0寄存器,值是0x05,表示系统调用原因是write
-
第二个参数放到w1寄存器,值是arg的地址,arg是一个数组,保存了write函数的三个参数。
-
执行hlt 0XF000
-
将返回数据,保存到value变量中
-
返回value变量值
从上可以看出,系统调用,是用hlt指令,来实现系统调用的。
如果要使用libgloss,那么就得要在异常处理程序,针对hlt 0xf000,这个系统调用,并且根据传参的w1寄存器的值,来实现对应的代码。这样newlib中的库函数,才能够正常的使用。
但是在实际中,我们是可以不用libgloss的,因为使用libgloss,需要使用系统调用,也就是会产生异常。我们可以直接去实现newlib需要的底层桩函数,比如_write,_open这些函数。
比如_write函数,实现打印的功能,那么将数据,打印到uart寄存器中即可。假设uart数据寄存器地址为0x13000000。
那么实现的代码可以如下:
int _write(int fd, char *ptr, int len) {
int i;
unsigned int *uart = (volatile unsigned int *)0x13000000;
for(i=0; i<len; i++)
        *uart = ptr[i];
}
这也是newlib库中,为什么要有newlib与main newlib的原因。在aarch64-none-elf-gcc编译器中,在工具编译的时候,就没有带上libgloss库,所以将来在编译程序的时候,是不会链接libgloss库,因此编译hello.c,会有报错信息。
在编译的时候,可以加上-v参数,可以查看编译过程:
aarch64-none-elf-gcc -v hello.c -o hello.elf
信息如下:
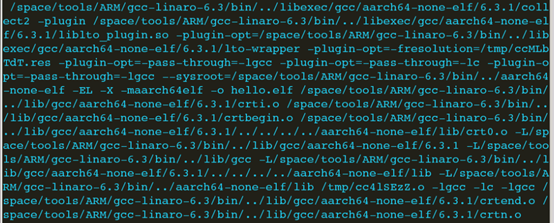
输出信息里面,没有带gloss。说明链接,没有使用libgloss库。
但是如果用riscv64-unknown-elf-gcc工具编译hello.c文件,那么是可以直接成功。
riscv64-unknown-elf-gcc -v hello.c -o hello.elf
信息如下:

输出信息中,有gloss,说明链接,是带有libgloss库进行链接,因此链接能够成功,最终生成hello.elf。